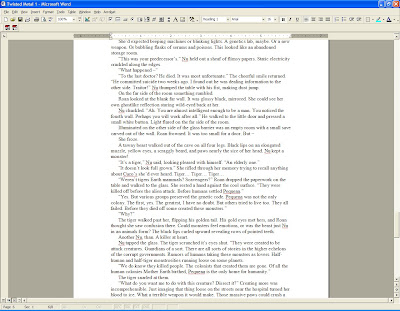
 If you're anything like me you start editing with a rough draft that looks like this...
A mass of letters on a word document.
Not only does this strain your eyes after two pages, it makes it hard to leave notes in the margin. Normally I content myself with double-spacing the manuscript and printing, but for this round of edits I needed more.
This time I'm taking notes on the manuscript before I start making changes. I need page numbers, reference marks, and organization.
Step 1: Headers and Footers
In a house with three small children, one large dog, and an sometimes-absent-minded spouse the risk of manuscript pages all over the living room floor is high. Enter the Header.
Click View
Click Header and FooterClick View
Type in what you want to see.... Mine is the basic Name-Page-Date.
 Step 2: Page Breaks
Somewhere out there is a dedicated author who will sit with her/his manuscript and read all 500 pages in one afternoon. I'm not sure if I envy or pity Dedicated Author, but I know that in real life, I need breaks. Every chapter should start on its own page. I'm pretty sure agents and publishers like page breaks too, but double check the submission standards before you use these on your final draft.
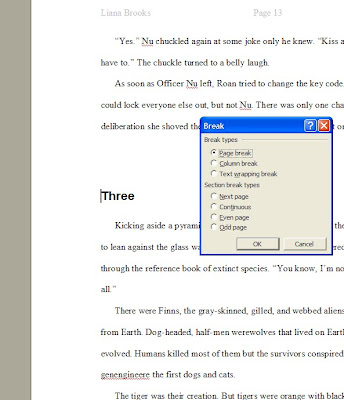
Select where you want the Page Break to start. A chapter heading is always nice.
Click Insert
Click Break
Page Break is the first option - Click Okay
Step Three: Line Numbers
 Line numbers aren't something you need when you format your manuscript for query, but they come in handy when you want to take notes on your manuscript.
In this round of edits I'm not changing anything, I'm just making lists of things I like, things I don't like, characters and their descriptions, and world details like the number of moons on each planet and the view from the kitchen window. Each list has a page number, a line number, and a note about the manuscript.
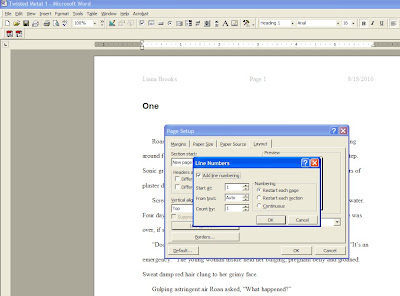
To insert line numbers Click File
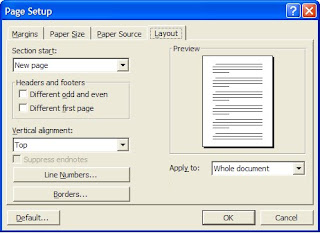
Click Page Setup
Click Layout - Page Setup automatically opens to margins
Click Line Numbers
Click Okay - The default setting starts each new page with line number 1, and counts by 1
Step Four: Reverse Printing
This is a handy trick from my college days that I'd forgotten until I faced the mind-numbing task of sorting 400+ pages of printed documents because my printer spat out page one first.
Click File
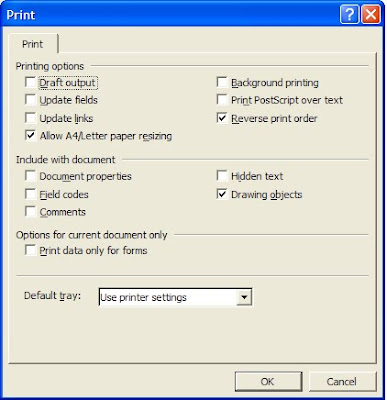
Click Print
Choose Options
Select Reverse Print Order - It's in the right hand column at the bottom. This makes page 405 print first, and page 1 print last so that your spiffy rough draft comes out in a neat pile and not a gargantuan mess.
Oh, you are a star!!! Great info. I'll be checking in for more tips.
ReplyDelete